Dollar Tree Crafts Can Look Like a Million Bucks #DollarTree #Review
You don’t have to spend a fortune –
BUT Dollar Tree helps you look like you did!
Easter

I am what you would call a wannabe DIYer. 🙂 Not only am I a wannabe DIYer, I’m also what some may refer to as a CHEAP DIYer. I mean, why spend more than you have to, right?!? My sisters used to ruthlessly pick on me because my go to store was (and still is) the Dollar Tree. Now that the money’s coming outta their pockets, they’ve discovered that the Dollar Tree is their new bestie too!
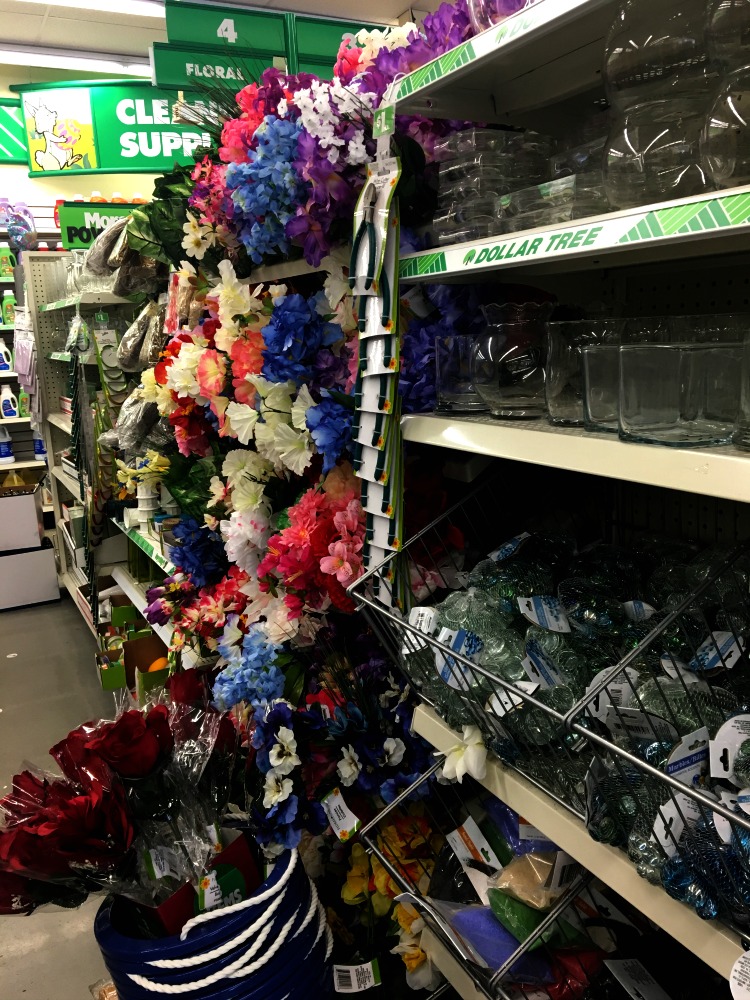
You wanna know what’s better than going to Dollar Tree to shop? Shopping at Dollar Tree in your pj’s from your couch! That’s right! Dollartree.com makes our lives sooo much easier. Looking for birthday party supplies? Dollartree.com can fill that order an you don’t have to fight the crowd! Looking for craft supplies for your classroom? Dollartree.com can deliver everything you need right to your door. Whether you need 1 or 100, dollartree.com has got your covered!!
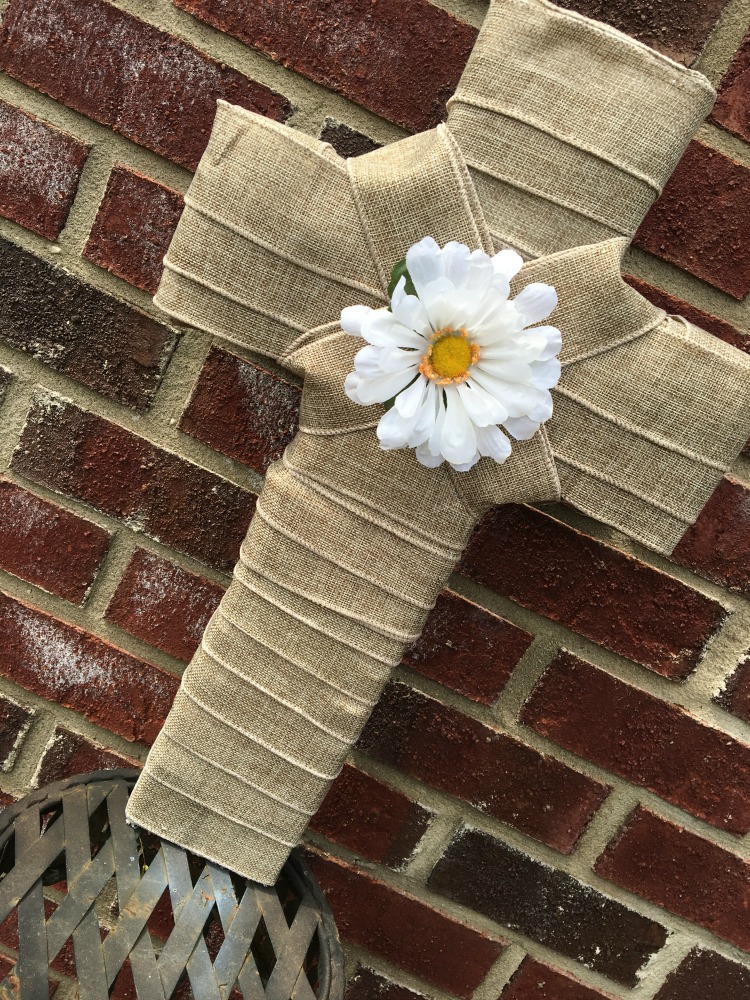
I’m constantly challenging myself to see how cheap I can do crafts that don’t look… well… cheap! My daughter has a playhouse that NEEDED an Easter wreath for her front door. (However, now that I’ve made it and it turned out so fabulous – it may be on MY front door!) I decided to make a cross wreath, it really did turn out even better than I had envisioned AND for around fifteen bucks!!! You can find the instructions and cost details below.
Supplies:
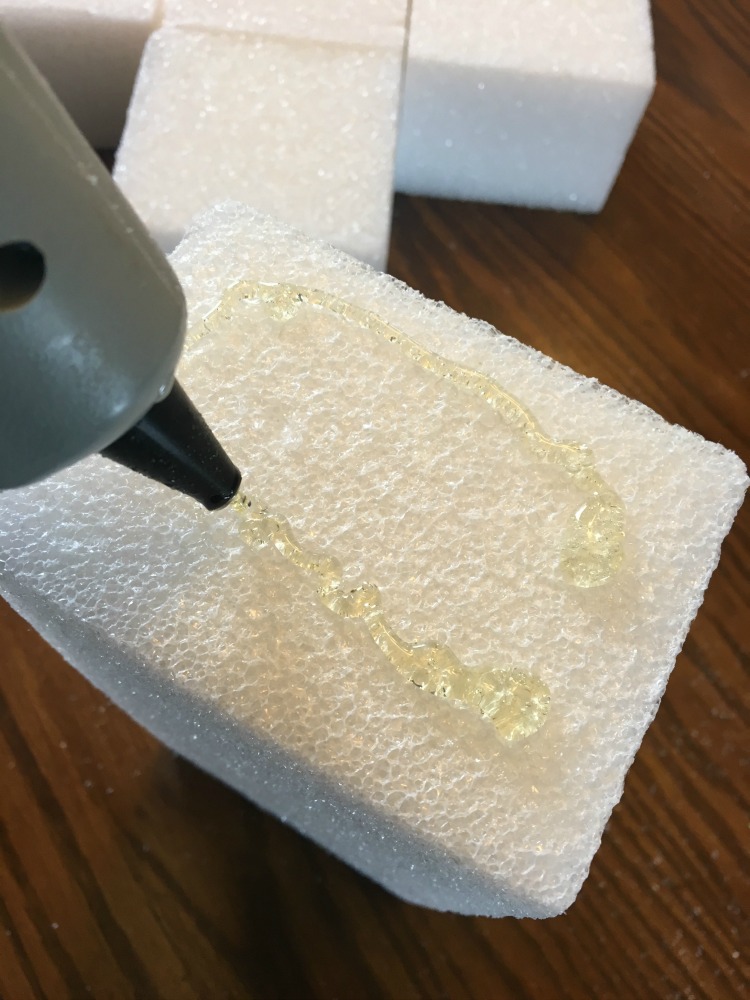
- 7- Styrofoam squares $7.56
- 6- Rolls of Burlap Ribbon $6.48
- Floral stems of choice (I used one stem) $1.08
- Hot glue gun (already had this on hand)
- Total cost for Project – $15.12
Directions:
Hot glue the square styrofoam pieces to make your desired shape. I chose a cross, you could make a square, rectangle, or anything your imagination comes up with. Let this dry completely (should take all of 30 seconds…)
After the hot glue has dried, start on the back side of the cross and hot glue down the end of the burlap ribbon. Start wrapping to your hearts content! Make sure and keep it pulled taut. I added a drop or two of glue every once in a while just to keep it nice and tight. A saggy cross just isn’t pretty! 🙂

After the cross is covered in the burlap ribbon, play with the floral stems and arrange in a way that makes you smile! I had thought I would use baby’s breath, but after I got done with the ribbon, a single daisy was all she called for.
You can hang it with ribbon if you’d like, I just wiggled an opening in the back between the ribbon and stuck the styrofoam on the nail. If you live in a windy area, this may not be an option for you.


Beautiful cross! Creative. I love dollar tree. I stop by there at least twice a month and always find something.
Great idea !! And I love dollar tree.
I love this idea and awesome job you did, I think I will be making one of these for the home also.
@tisonlyme143